INTRODUCTION: LAYERS
In this second tutorial from the Adobe Photoshop Essentials series, we are going to take an in-depth look into layers. In other words, we are going to take a look at the basic interaction between layers, and the layers palette.
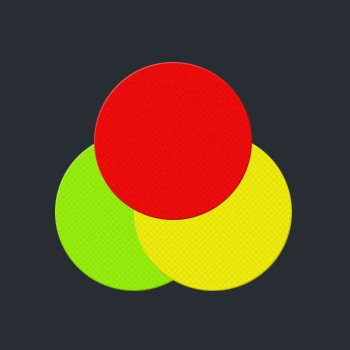
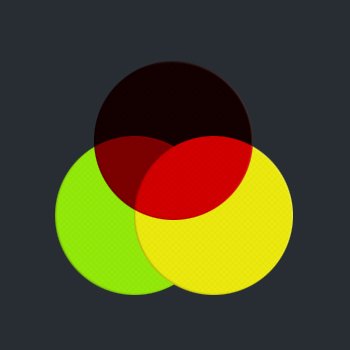
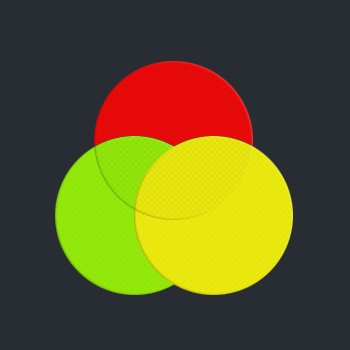
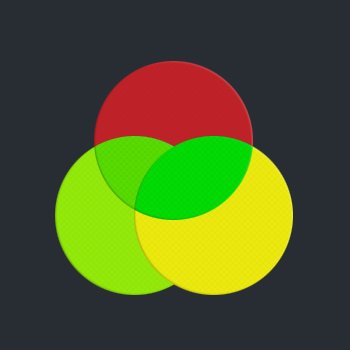
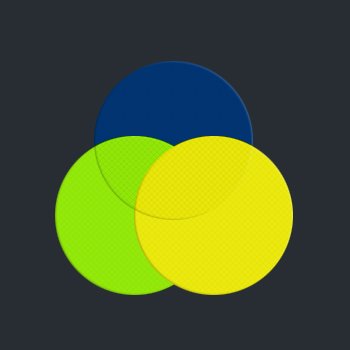
Basically layers are the individual modifiable elements that compose the image. The final product from Photoshop might look like one single flat image, but the reality is quite different, complex images are usually composed of many stacked layers. For example the image below is composed of 4 different layers.
LAYERS PALETTE
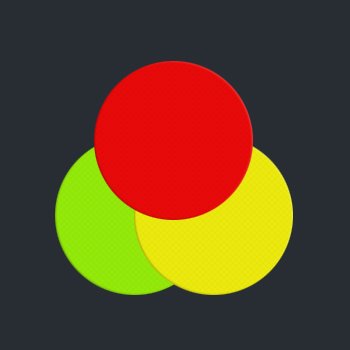
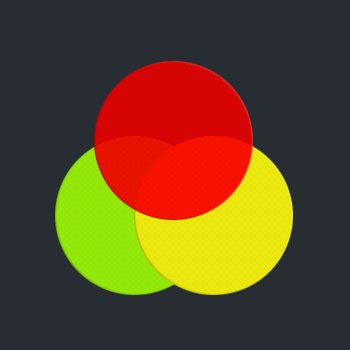
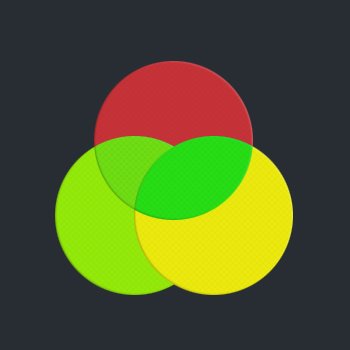
Just to refresh your memory from the previous lesson, the image below represents the Layers Palette. Within the layers palette you can find all the layers that compose your image. Inside this layers palette you can see the 4 layers, that composed the previous image. So the layers are stacked on one another, at the bottom we have the background layer covering the whole canvas, then on top of it we have the green circle, then the yellow circle, then the red circle.
But besides showing the position of the layers, the layers palette is responsible for others things too. Take the numbers on the layers palette presented on the image below as a guidance of what part of the palette I am explaining.

1. LAYER FILTERING OPTION
In the first section of the layers palette we have the Layer Filtering options. In simple terms, all you can do here is select which layers you want to be presented in the layers palette. In a scenario where you have 100 plus layers, it would be time consuming finding a specific type of layer. Looking at the icons from left to right you can sort the layers by: Raster Layers, Adjustment Layers, Type Layers, Shape Layers, and Smart Objects.
2. BLENDING MODE & OPACITY
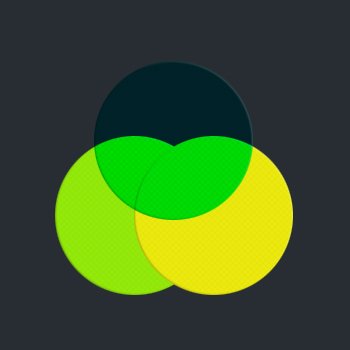
- The Blending Mode for the layer determines how two layer are blended into each other. Currently the blend mode is set to normal, so the top layer will simply cover the layers below it. We will go in more detail concerning the blending mode later.
- Opacity is responsible for the visibility of the complete layer including the layer styles applied to the layer.
3. LOCK PROPERTIES & FILL OPTION
- The first icon is Lock Transparent Pixels which locks the transparency of the layer, meaning you can only edit the opaque portion of the layer.
- The second icon is Lock Image Pixels and when activated will prevent the layer from being edited with the painting tools. The third icon is Lock Position which will locks the position of the layer. Finally Lock All locks the layer completely.
- The Fill Option only interacts with the visibility of the layer excluding the layer styles, unlike the Opacity Option which interacts with the layer and the layer styles attached to that layer.
- With the lock properties you have the option to lock layers fully or partially. For example if you are done editing one layer you can lock it fully, or you can lock the layer only partially.
4. BOTTOM SECTION
In the final section we have Link Layers, Layer Style, Layer Mask, Adjustment Layer, Create Group, New Layer, and Delete Layer.
- Link Layers by selecting two different layers, and clicking on the link layers button, you will interlock the two layers. In other words if you move one layer, the other interlocked layer will move along accordingly.
- With the Layer Style button, you can add a layer style to a layer. By selecting a layer, and clicking the layer styles button, the layer styles palette will open. (We will cover layer styles in-depth in Part 3)
- In order to mask a layer you will need to use the Layer Mask. You can do this by selecting a layer first, then click on the layer mask button in order to create a mask for the layer. (We will cover masks in-depth in Part 5)
- Just like the previous scenarios Adjustment Layer is not much different. By clicking on the adjustment layer button, you will open the adjustment layer menu, so you can create an adjustment layer. (We will cover adjustment layers in-depth in Part 4)
- The Create Group is rather self explanatory. Select two or more layers, then click on the Create Group button, and automatically the selected layers will be placed in one group.
- Similarly the New Layer is not much different. This is a short cut for creating a new layer, or alternatively you can press ctrl + shift + n.
- And finally we have the Delete Layer button. Select a layer first, then click on the Delete Layer icon, and the selected layer will get deleted.
BLENDING MODE
The blending mode in Photoshop defines how the pixels in the image interact with the painting and editing tools, or how one layer interacts with the layers below. For now we are going to focus just with the blending properties between layers.

As you can see in the image above, the blending modes are separated into 6 groups. The Basic group replaces the base pixels, the Darken group darkens the base pixels while the Lighten category lightens them, the Contrast group affects the overall contrast, the Comparative inverts the base color while the HSL modes apply color components.
Just like everything else with Photoshop, the best way to go is with practice. Download the source file in order to repeat what I am doing in the examples below. Once you download the example file, open it in Adobe Photoshop, then select the top layer and follow my lead in order what blending mode to select.
BASIC BLENDING MODES
Normal
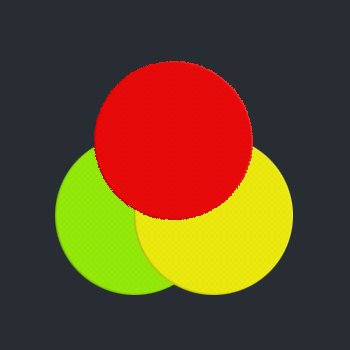
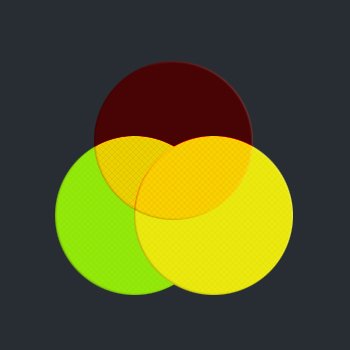
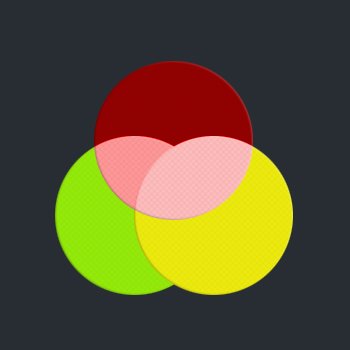
In the following example the blend mode is set to Normal, the opaque portion of the top layer replaces the pixels from the layers below.
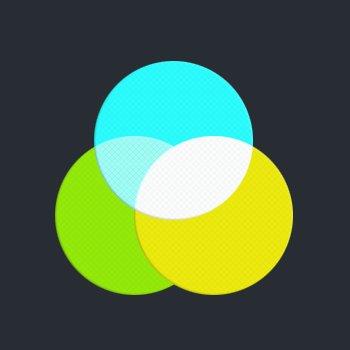
Dissolve
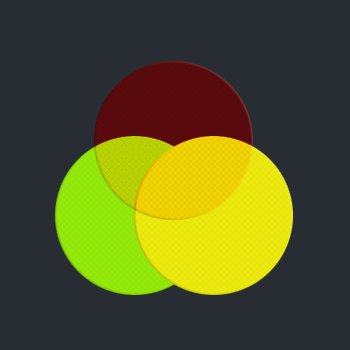
Blends the top layer with the bottom layer by replacing pattern of pixels, for the effect to be greater reduce the top layer opacity.
DARKEN BLENDING MODES
Darken
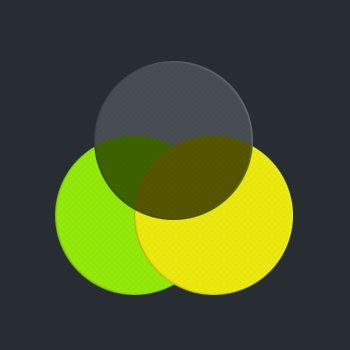
Darken mode compares the pixels between the top and the bottom layers, the darker pixels will replace the lighter ones.

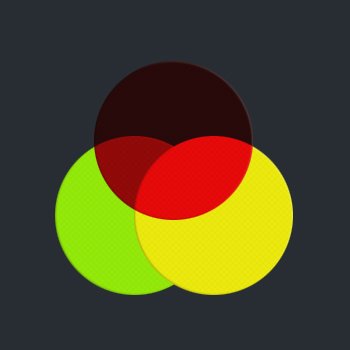
Multiply
This is often used blend mode in order to simply and easily create artificial shadows. In practice the end result looks as if you have used a marker on the layers, duplicating the top layer with the same blend mode will result as stroking the marker again over the layers and darkening the color in the process.

Color Burn
The layers below the top layer will be burned by the top layer, the lighter the top layer is, the less intensive result you will get.
Linear Burn
Very similar effect to Color Burn but a bit more intensive. The same applies here also, the lighter the color the less result you will see.
Darker Color
Compares the top and bottom layer, and replaces the darker pixels with the lighter ones.
LIGHTEN BLENDING MODES
Lighten
The pixels that are darker compared to the top layer will be replaced with the lighter ones, while lighter pixels wont be affected.

Screen
Screen will multiply the inverse of the top layer and the layers below, the resulting image will be always lighter. There is a simple method (not the best) with screen mode to correct underexposed images. Simply duplicate the image, apply the screen blend mode on the top layer, and finally adjust the opacity of the top layer until the desired result is achieved.
Color Dodge
Color Dodge will make the image overall lighter by using the top layer to dodge the colors of the layers below.

Linear Dodge
Technically similar to Color Dodge, but instead of decreasing the contrast, here it will increase the brightness. In practice it is more similar to screen mode but much more intensive.
Lighter Color
A combination of Multiply and Screen, where the base layer shines through.
CONTRAST BLENDING MODES
Overlay
Overlay is in a way combination of Multiply and Screen mode, here the highlights and shadows of the base color are preserved.
Soft Light
Very similar to Overlay mode, the difference is the effect is much more subtle.

Linear Light
Similar to Vivid Light, but much more intensive. It will burn or dodge the color by decreasing or increasing the contrast.

Vivid Light
This mode is a combination of Color Dodge and Color Burn, it will burn or dodge the color by decreasing the contrast.
Hard Light
Again similar mode to Soft Light and overlay, but much more intensive compared to the two.

Pin Light
This is a combination of Lighten and Darken mode, it will blend the light pixels with lighten mode, and the dark pixels with darken mode.

Hard Mix
The luminosity of the top layer is blended with the pixels of the bottom layer.
COMPARATIVE BLENDING MODES
Difference
Difference will subtract the lighter pixels between the two layers.
Exclusion
Similar effect to Difference mode, but the end result is more subtle.
Subtract
Subtracts the color from the top layer with the color of the layers below.
Divide
Similar to the Subtract mode in theory, instead of subtracting the color it divides them.
TONAL BLENDING MODES

Hue
Hue mode combines the hue from the top layer with the saturation and luminance from the bottom layer.
Saturation
Saturation mode combines the saturation from the top layer with the hue and luminance from the bottom layer.
Color
Color mode combines the hue and saturation from the top layer with the luminance from the bottom layer.
Luminosity
Luminosity mode combines the hue and saturation from the top layer the luminance of the bottom layer.


Great work Marijan. Thank you…
Thanks man, the next part will be about Layer Styles, and it will be more practical with less theory.
Thanks…very helpful
Nice !
Thanks so much…as a total newbie to working with Layers, I really appreciate the simple, progressive method of teaching…especially the very basic illustrations. I’m a visual learner & this is what I’ve been hunting for.